
How to Make DIY Lampshades from Vintage Napkins
Learn how to make lampshade out of vintage napkins to cover ugly pendant lights in just 10 minutes.
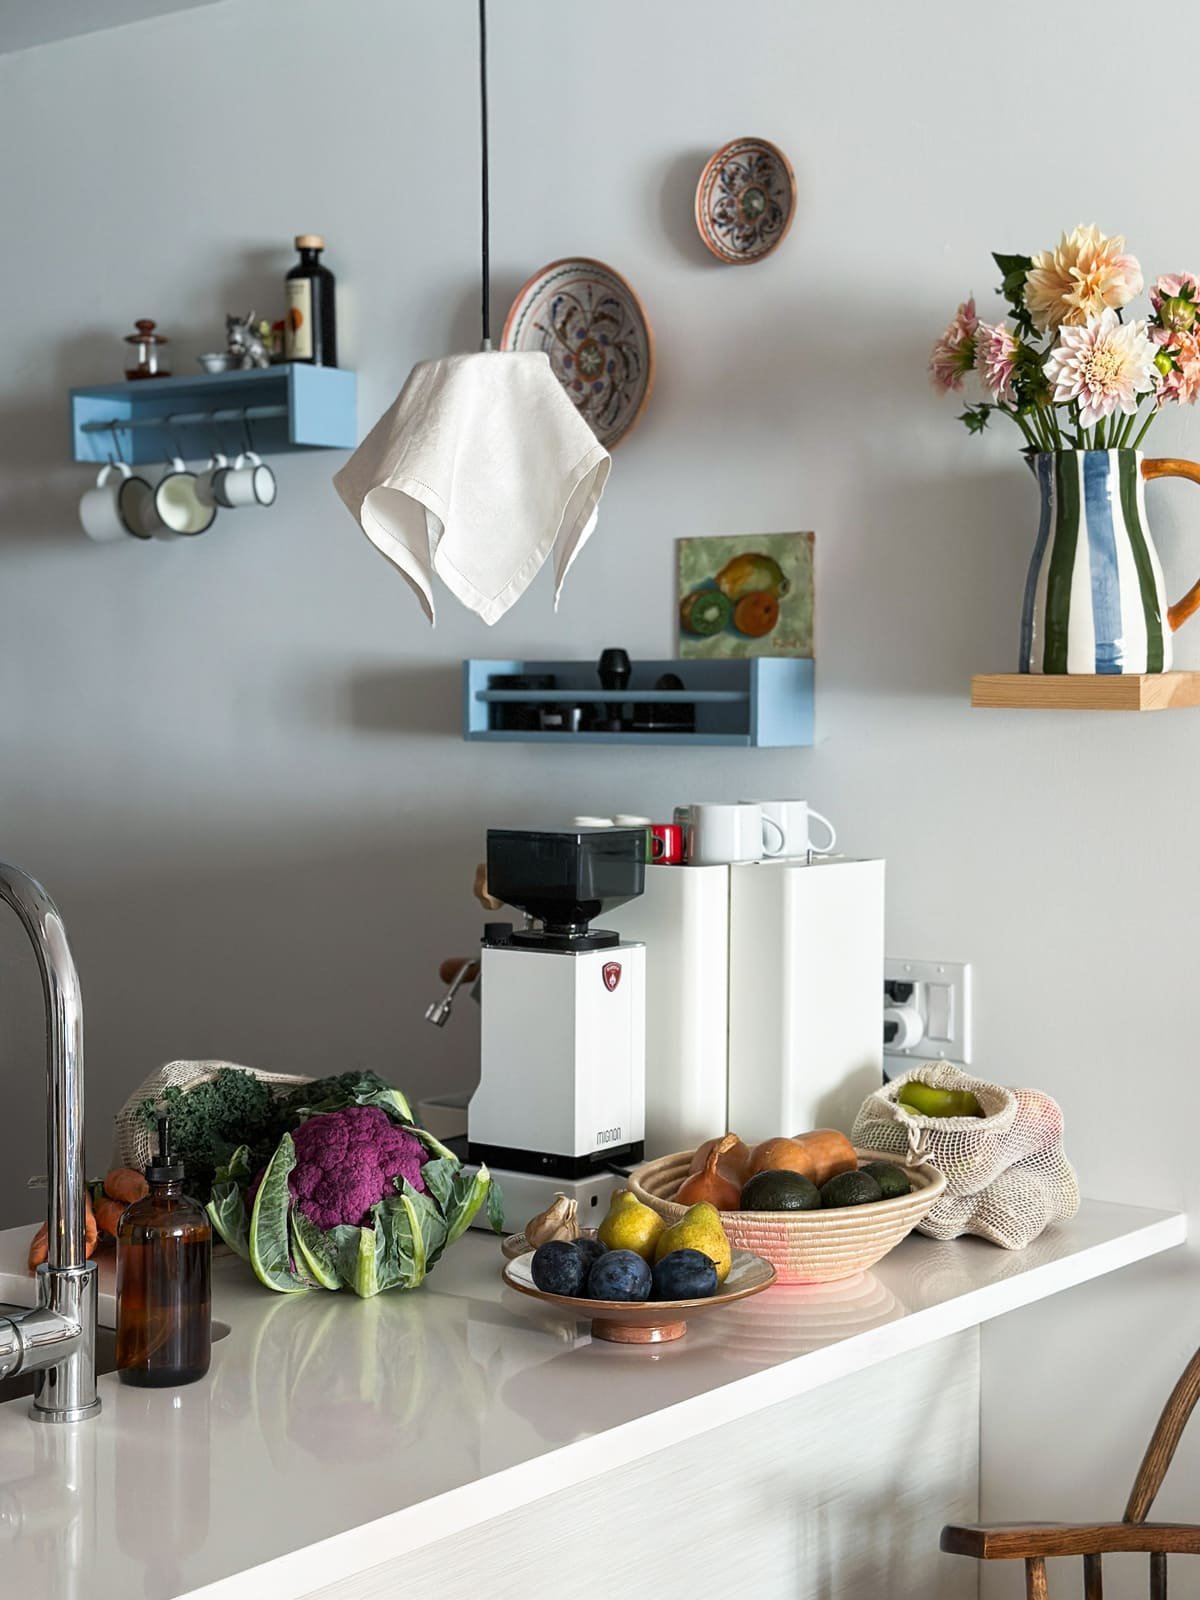
I live in a builder grade apartment in Brooklyn which is filled with ugly fixtures I never would have chosen – from boob lights aplenty to these grey cement pendants hung over my kitchen counter. The former are fairly easy to replace (or hide), but the latter proved a bigger challenge. I had successfully used decor to bring warmth and charm to my gray builder-grade kitchen, but the cement pendant lights stuck out like a sore I'm not sure it would have been worth the expense and effort to replace them. I had to get a bit more creative and think outside the box. The solution: I DIY’ed my own shade that covers the pendant and softens the overall look of the kitchen.
Honestly, the shades turned out better than I expected, and I was left wondering, why don’t these exist? Until they do, I’m sharing the references, supplies, and step-by-step process how I made mine.
A curated guide to creating a one-of-a-kind home: interior inspiration, styling tips, & unique objects
FOLLOW ALONGRELATED POSTSEasy, Creative Styling Ideas for A Spring Refresh
Every product is curated independently. Things you buy through our links may earn us a commission.
sense of spen• cer
noun [sɛns, əv, ˈspɛnsər]
Reflecting one’s identity through their interiors
A home with character and soul
When a house becomes a home
Before & After
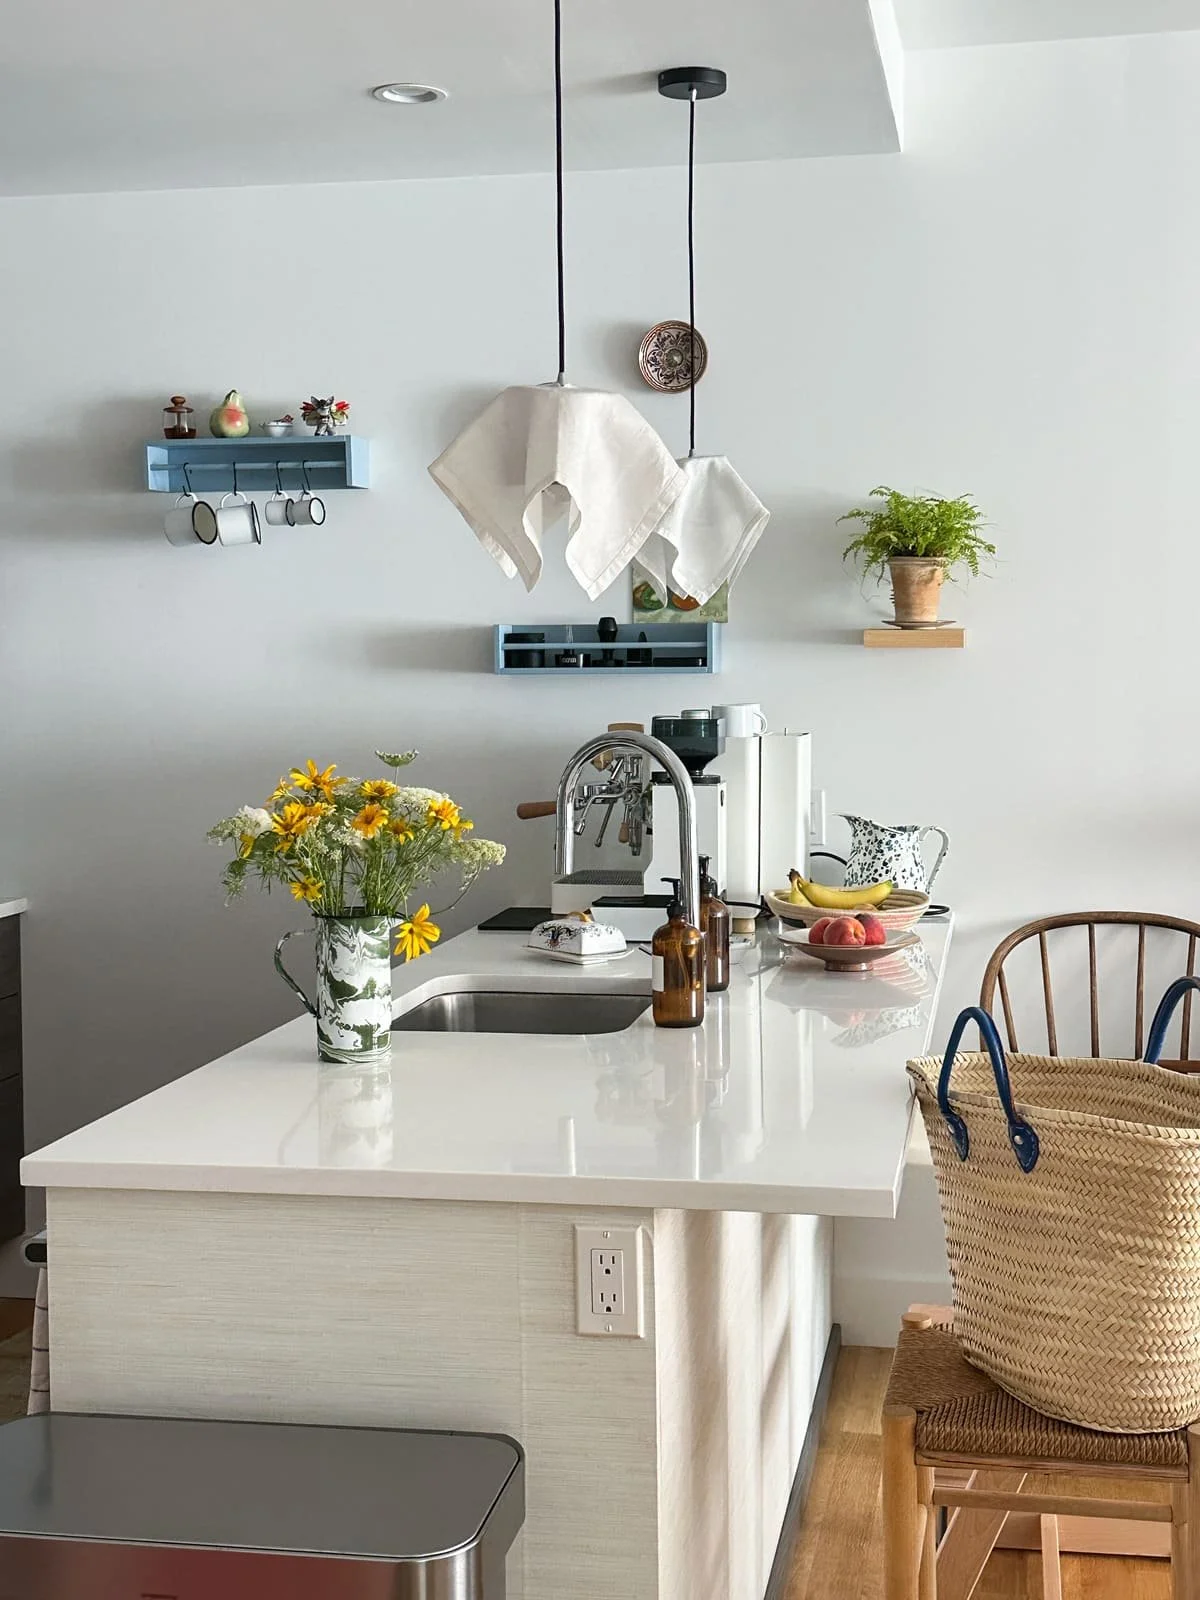
These grey cement pendants in my kitchen read as cold – the opposite of what I was going for. It turns out that I didn’t have to replace them; I could just cover them. I constructed my own shades out of vintage napkins fastened with a few buttons and draped from cardboard. Once I ordered the supplies, it probably took me 10 minutes to make and install them.
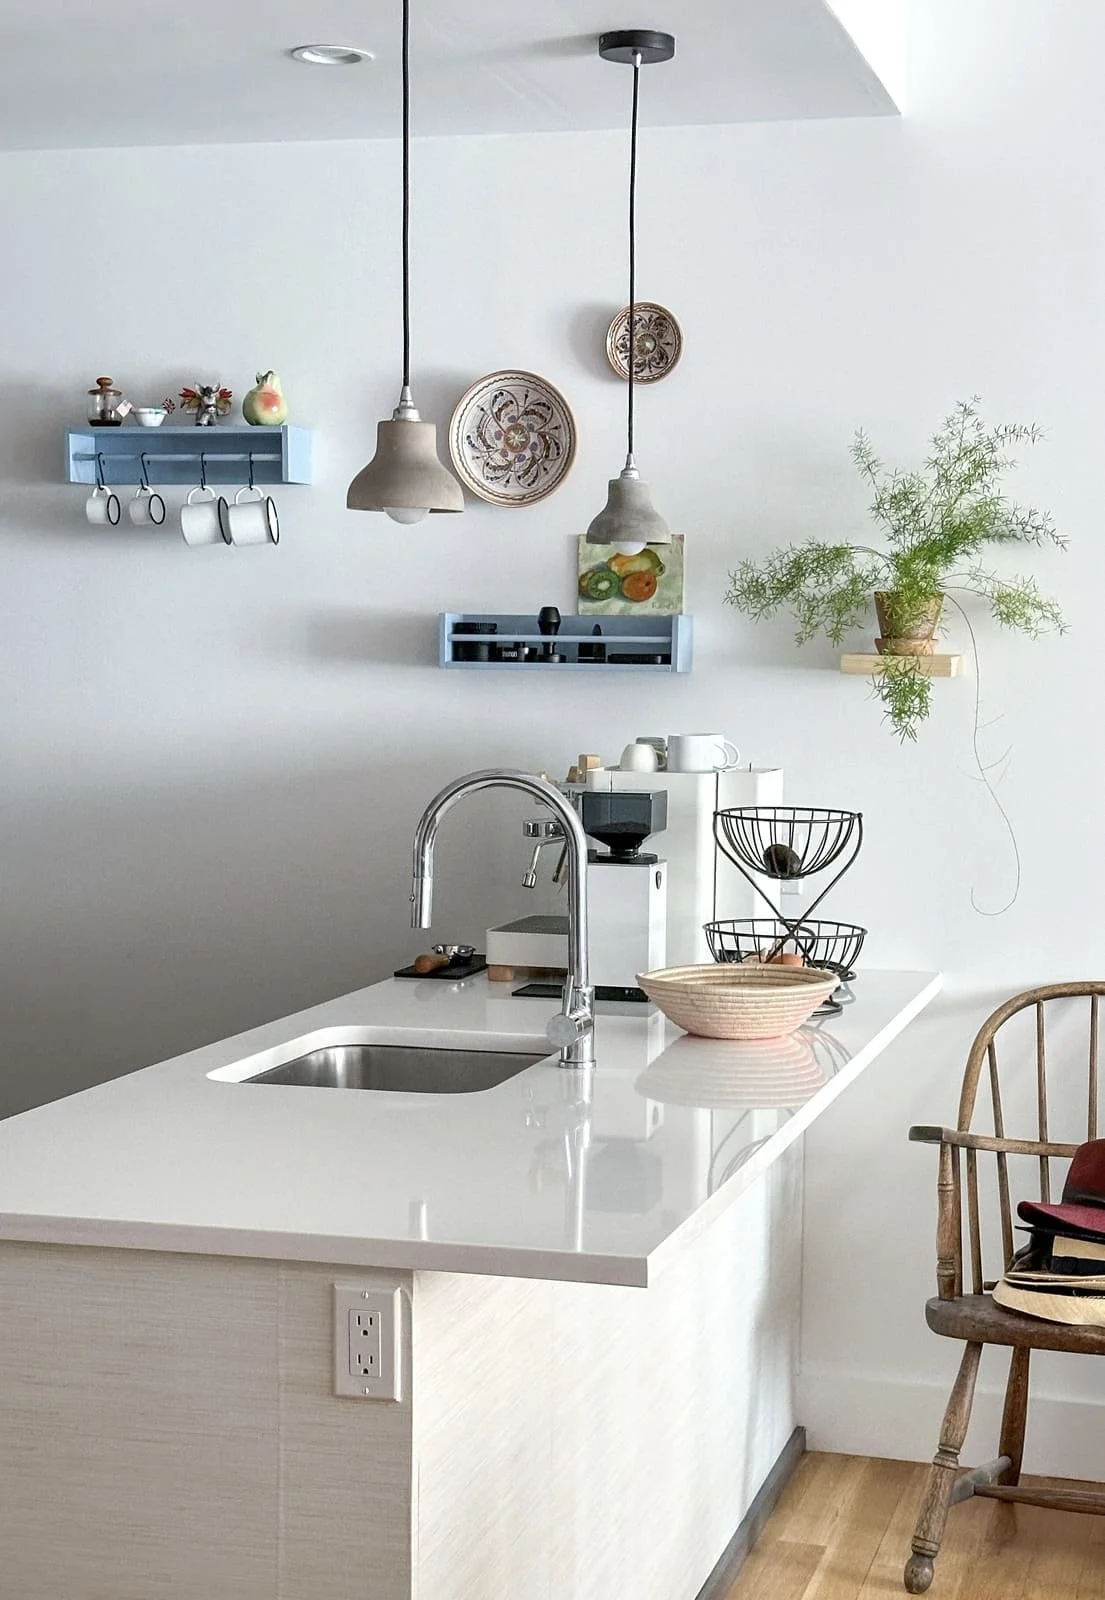
BEFORE: the cold grey pendants installed by builders
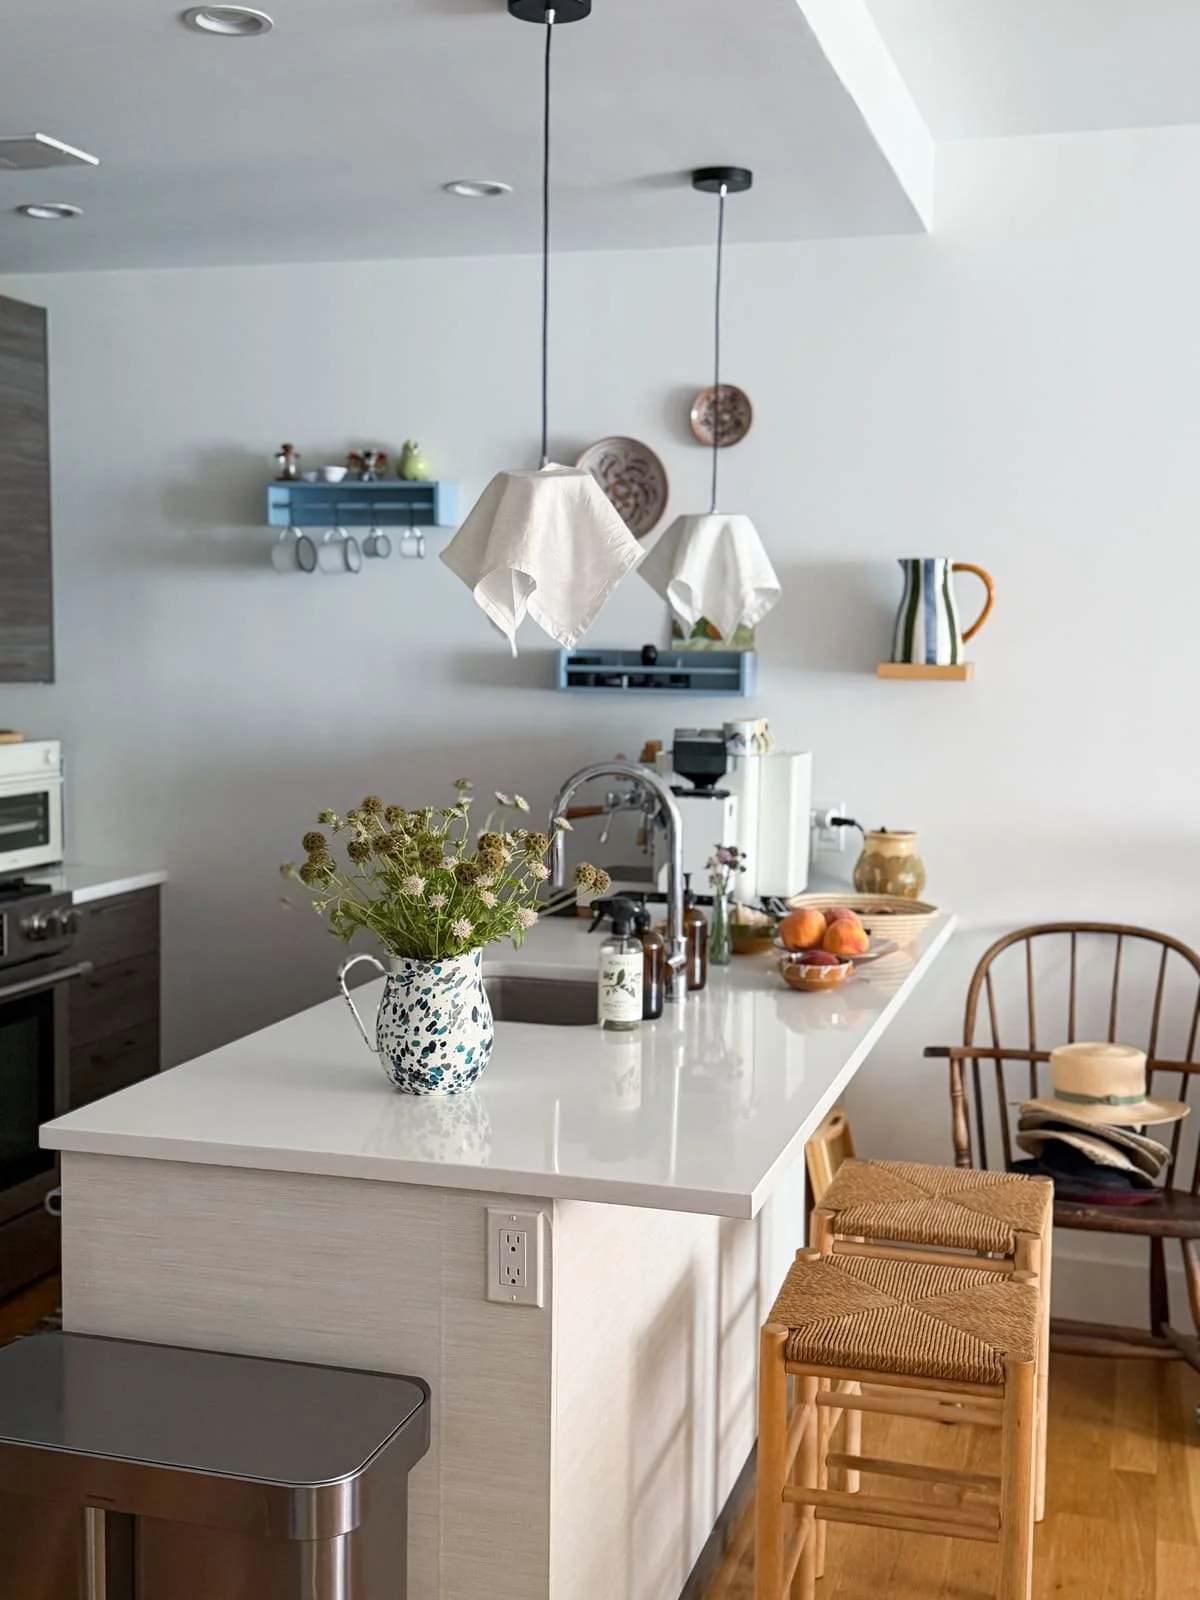
AFTER: customized with my DIY lampshades
The Vision
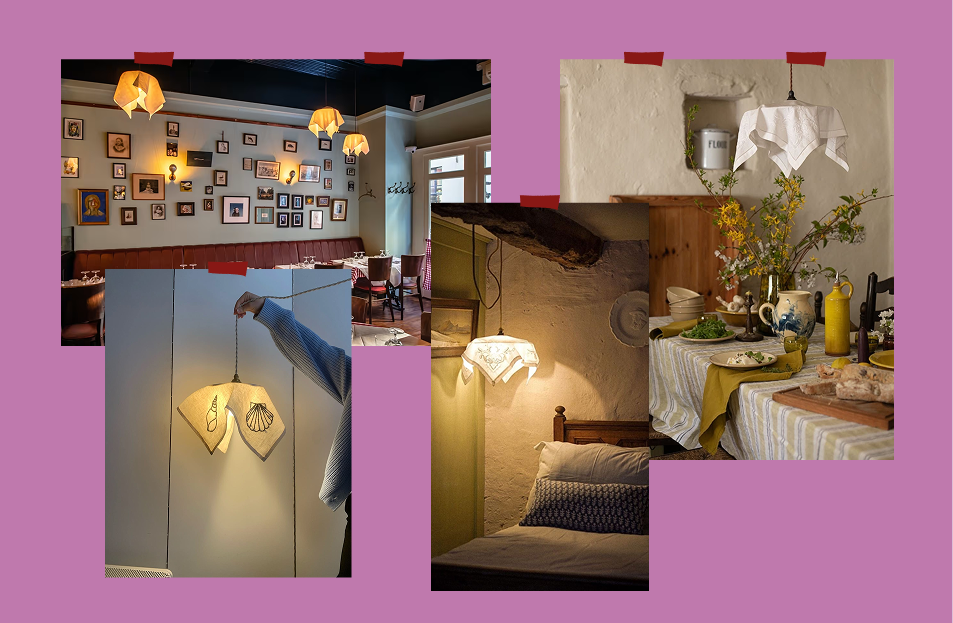
For a while I kept seeing pendant lights that resembled napkins – all in the UK. One was a restaurant in London I spotted in a photo from a food account. Another was seen in a well-loved hotel stay in Wales – both over a kitchen table and a bedside table. At first I tried to hunt down these exact shades, to no avail – even after repeated reverse image searches.
Then, my wheels started turning. If they resemble napkins, why can’t I just make them myself out of actual napkins? I noticed the napkins had pretty details that shone when the light was on, so that pointed me toward vintage napkins. How I actually made them will be covered below.
Supplies
Here’s what I used – most of it I already had lying around my home.
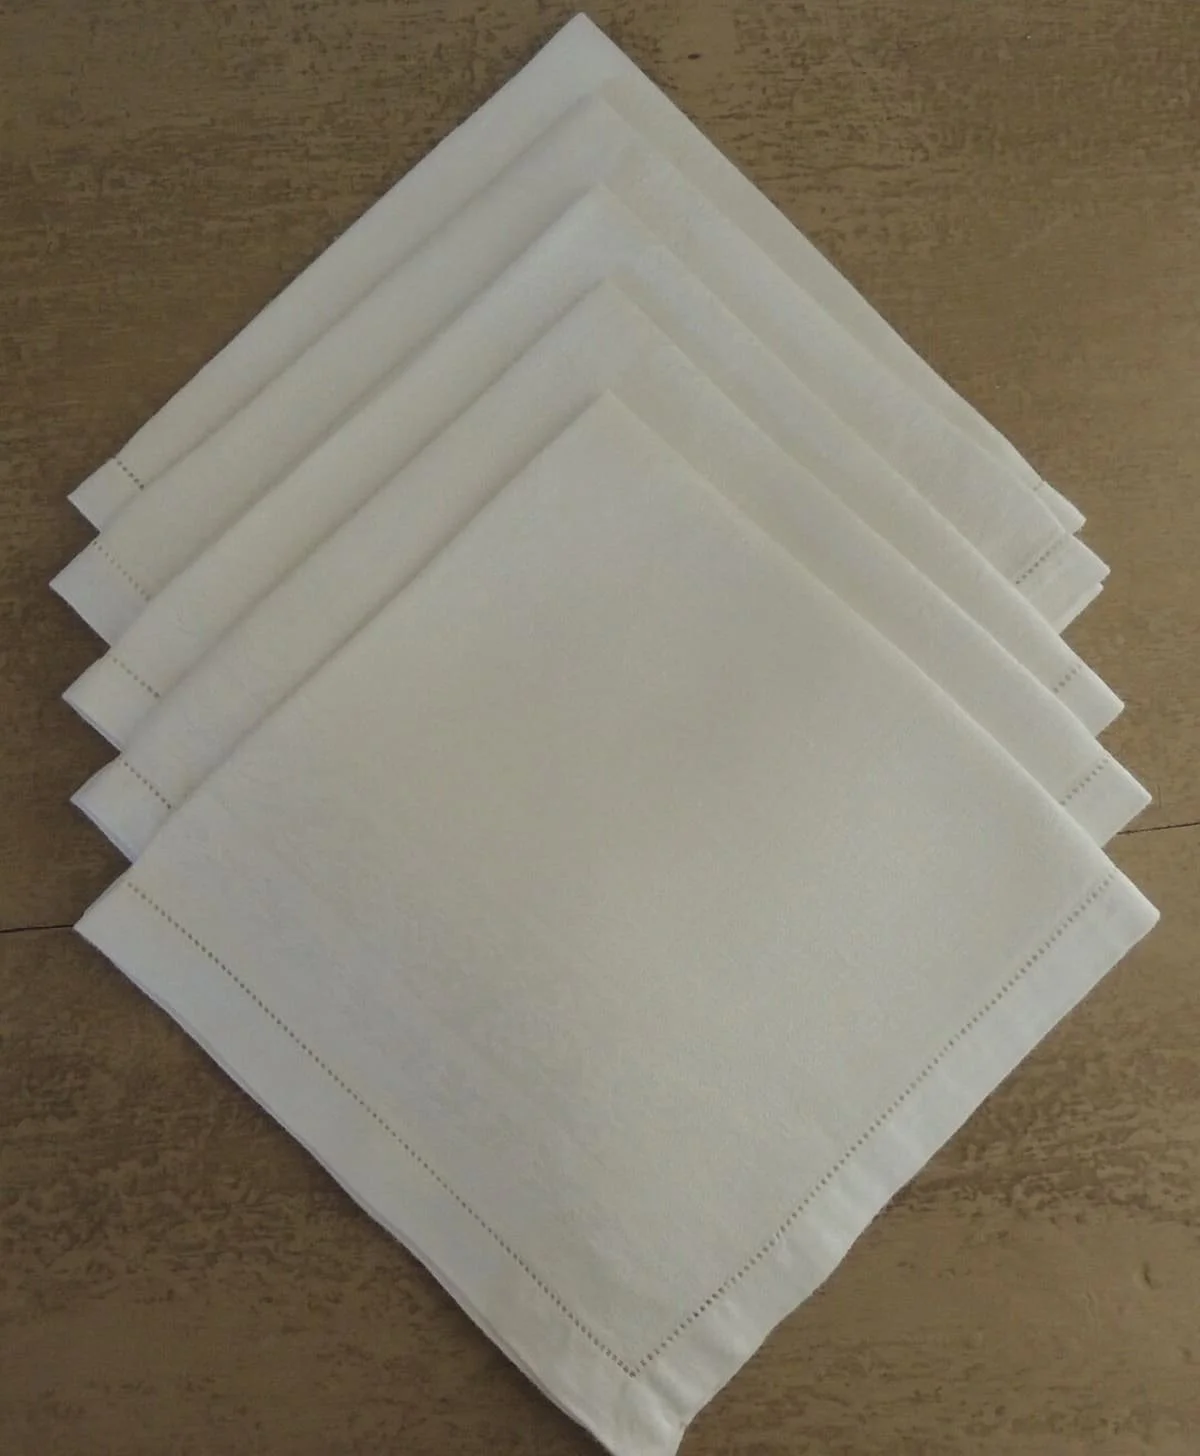
Vintage napkins of your choice
I needed 2 shades and figured it was a good idea to have back-up in case I made a mistake or had to replace any. So, I got a set of 4.
I looked for shades with pretty but subtle details like hemstitching and damask fabric.
I made sure that the size of the napkin accounted for the drop I was looking for, proportion to the light. My pendants are relatively small so 16” napkins were perfect.
If you’re doing a large shade, you might want to look for a small tablecloth.
Sewing materials – white thread, needle, and fabric scissors
White buttons, one for each shade (I found some from an old buttondown)
Cardboard circle cut out from a box
Sourcing napkins
Where to find vintage napkins:
What to look for: 16-20" square or small square tablecloth; search: "vintage napkin linen or cotton" or "hemstitched napkin", “damask napkin”
Step-by-step process
Here’s how I made lampshades out of napkins to go on top of existing pendants.
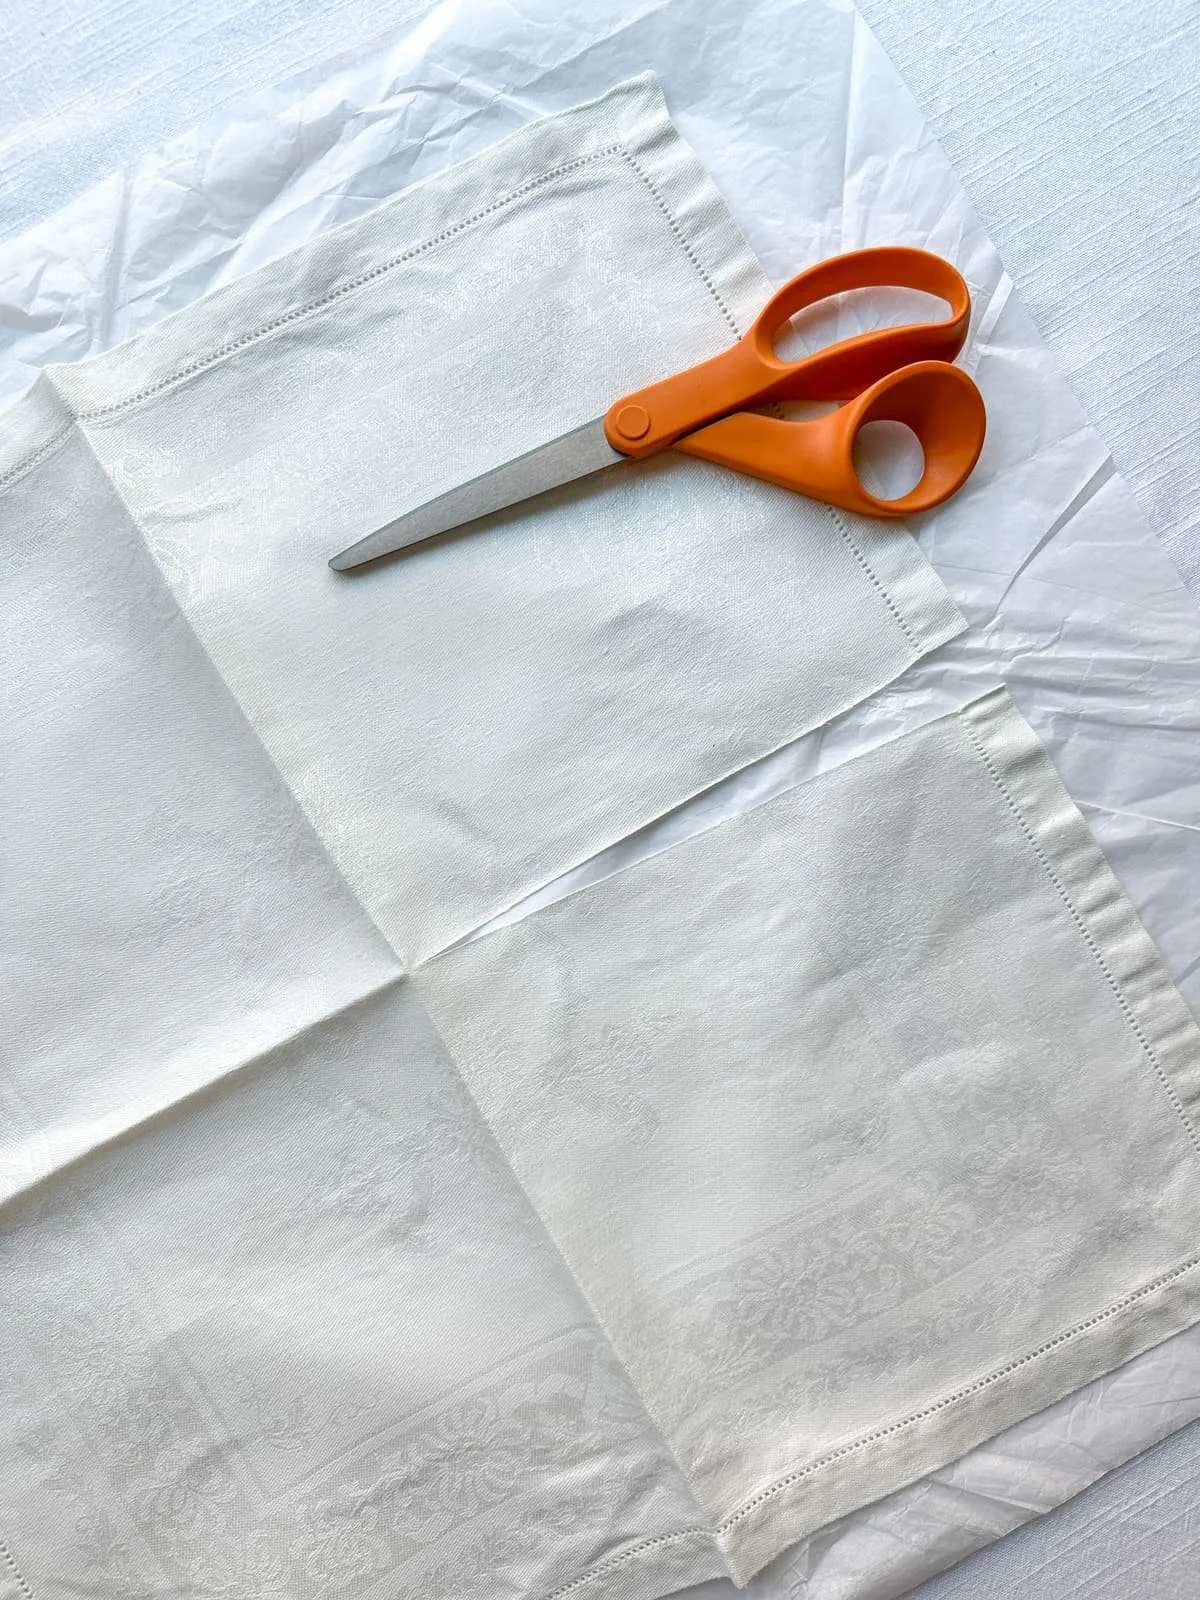
Cut - fold the napkin into quarters to create creases (if they don’t already exist), then unfold the napkin and lay flat. Identify a crease running from the middle of one side to the center and cut it with sharp fabric scissors.Trim any rogue threads.
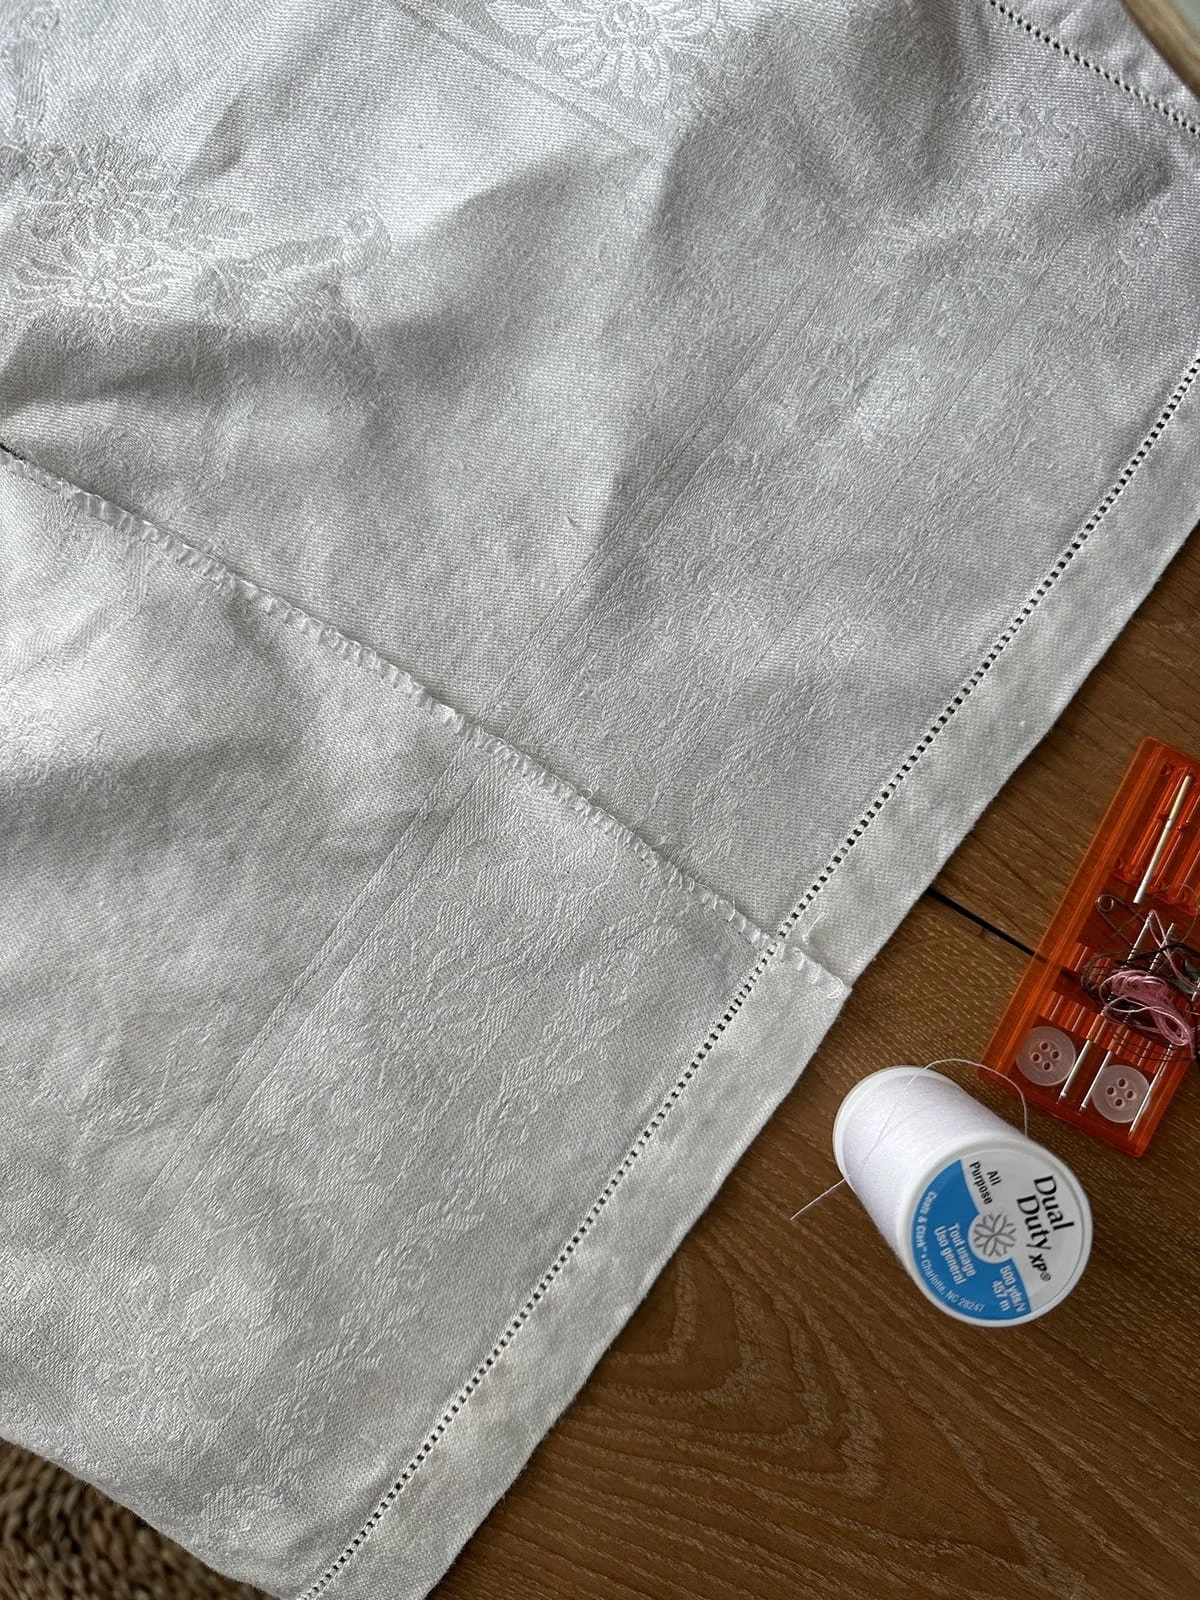
Finish it - the two sides of the cut opening are going to fray a bit. To give it a cleaner look, finish each side with a needle and thread (or sewing machine if you have). I used an overstitch. It doesn’t have to look perfect.
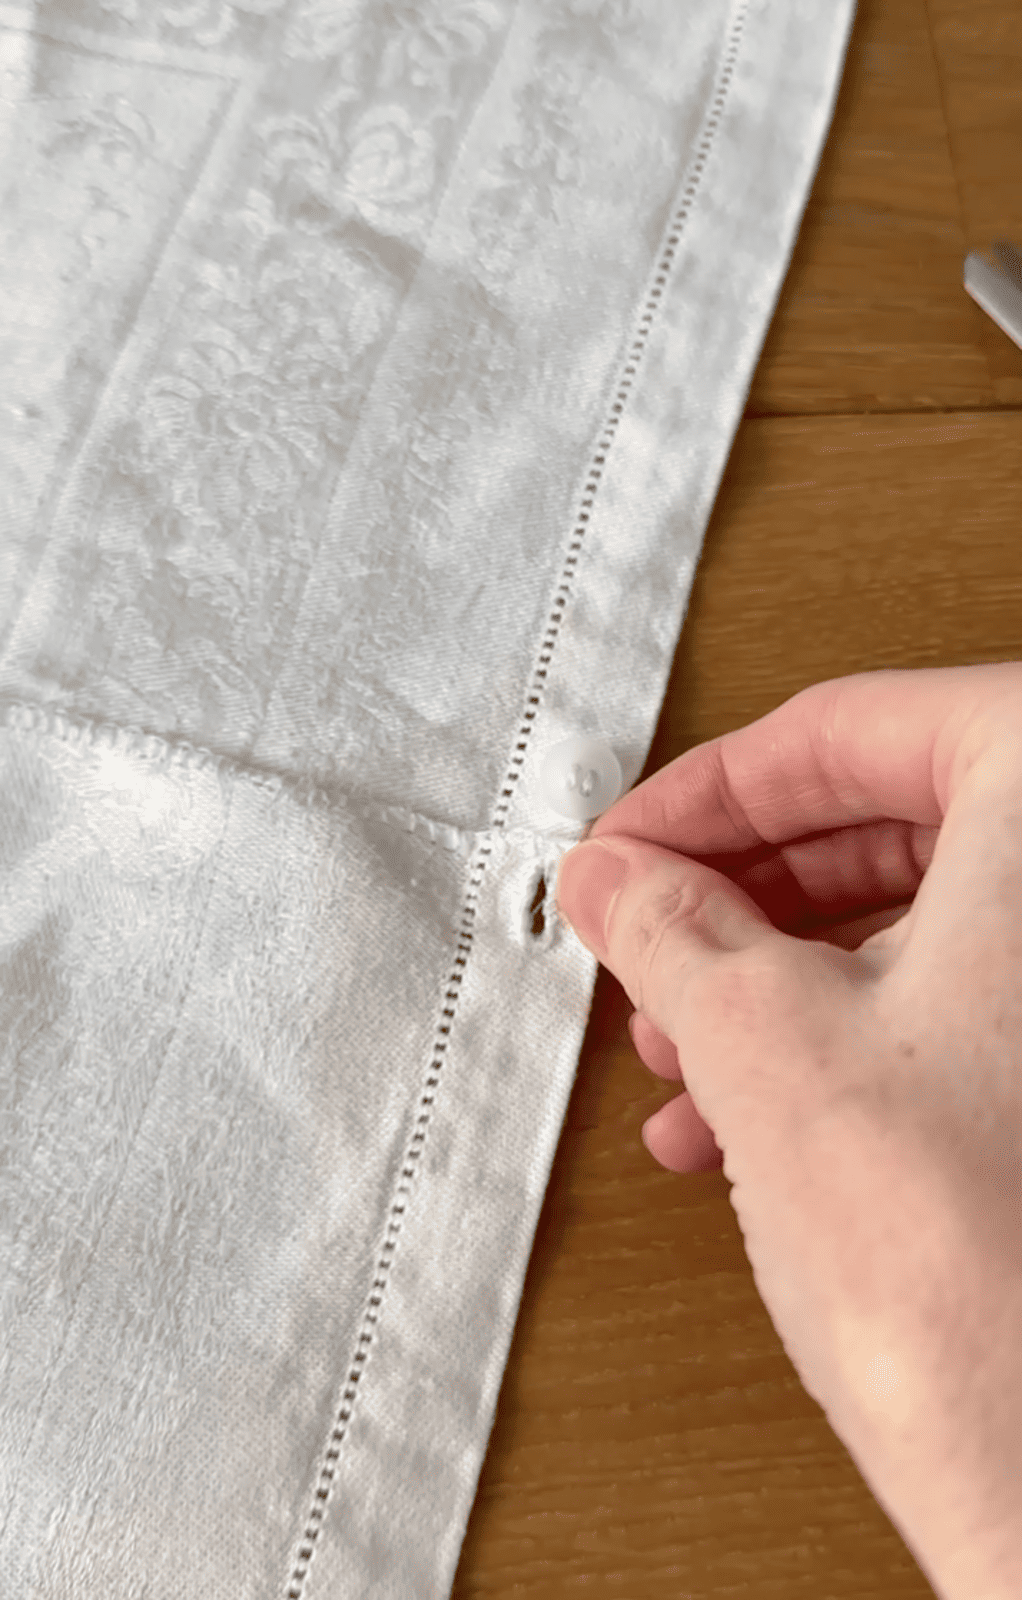
Add buttons - decide on a location for the button on one side of the cut part (I put mine outside the hemstitch border). Cut a hole a few centimeters from the edge – I choose to finish with an overstitch. Sew the button on the opposite side so that they will meet.
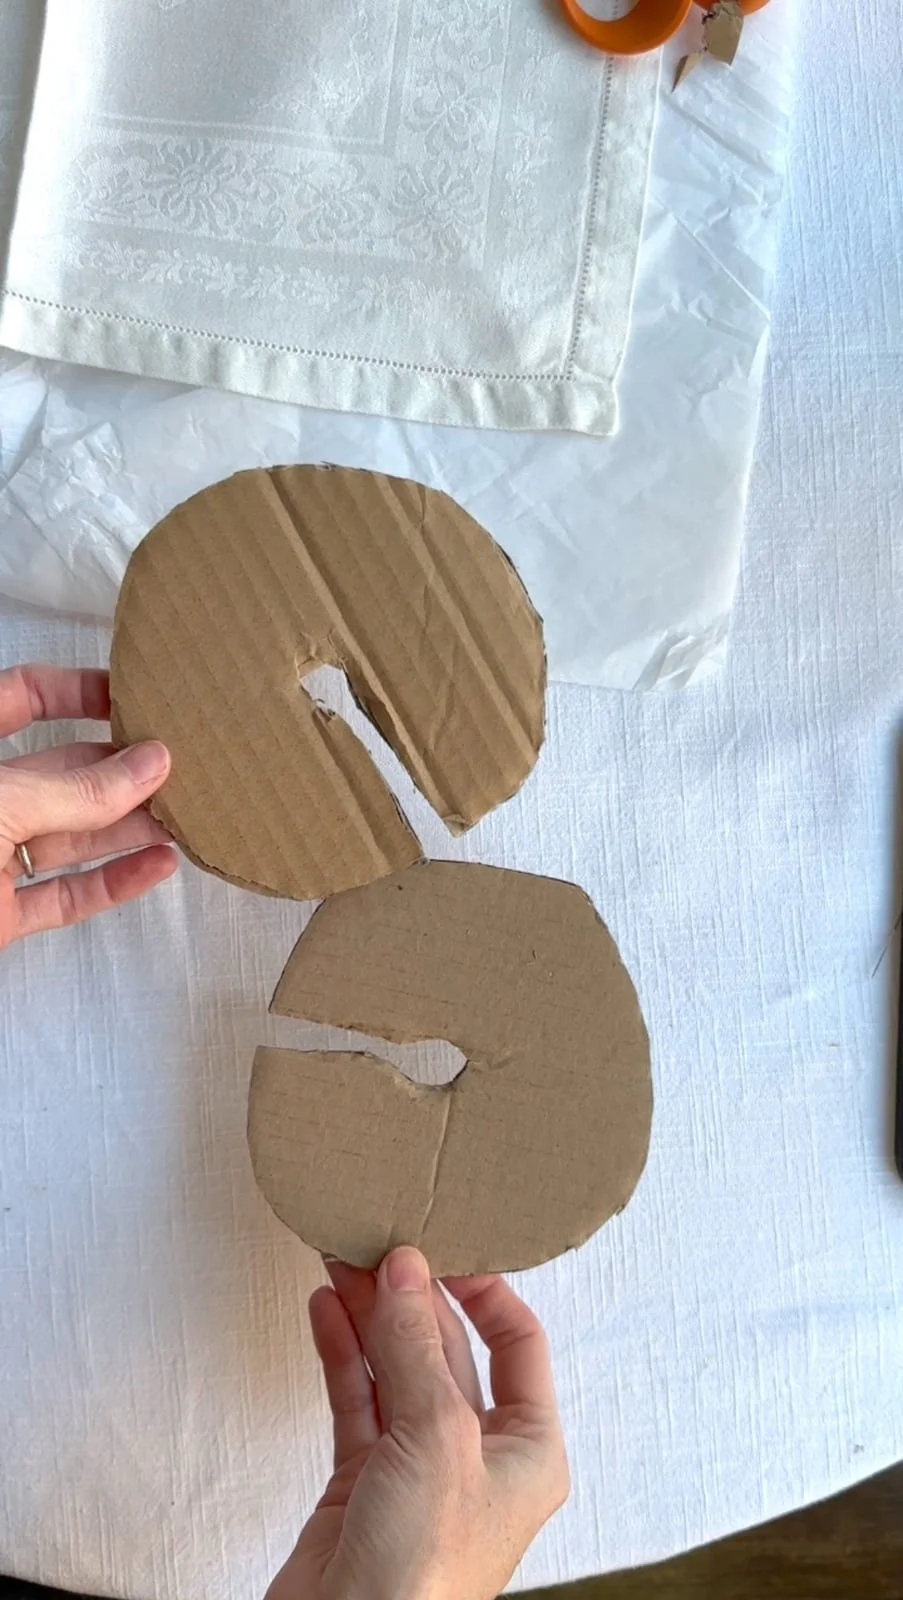
Prep cardboard circle - use a bowl (or anything round) to stencil a circle on a piece of cardboard. You may need to play around with sizing to get the drop right — mine are the diameter of a cereal bowl. Cut a slit from the side to the middle.
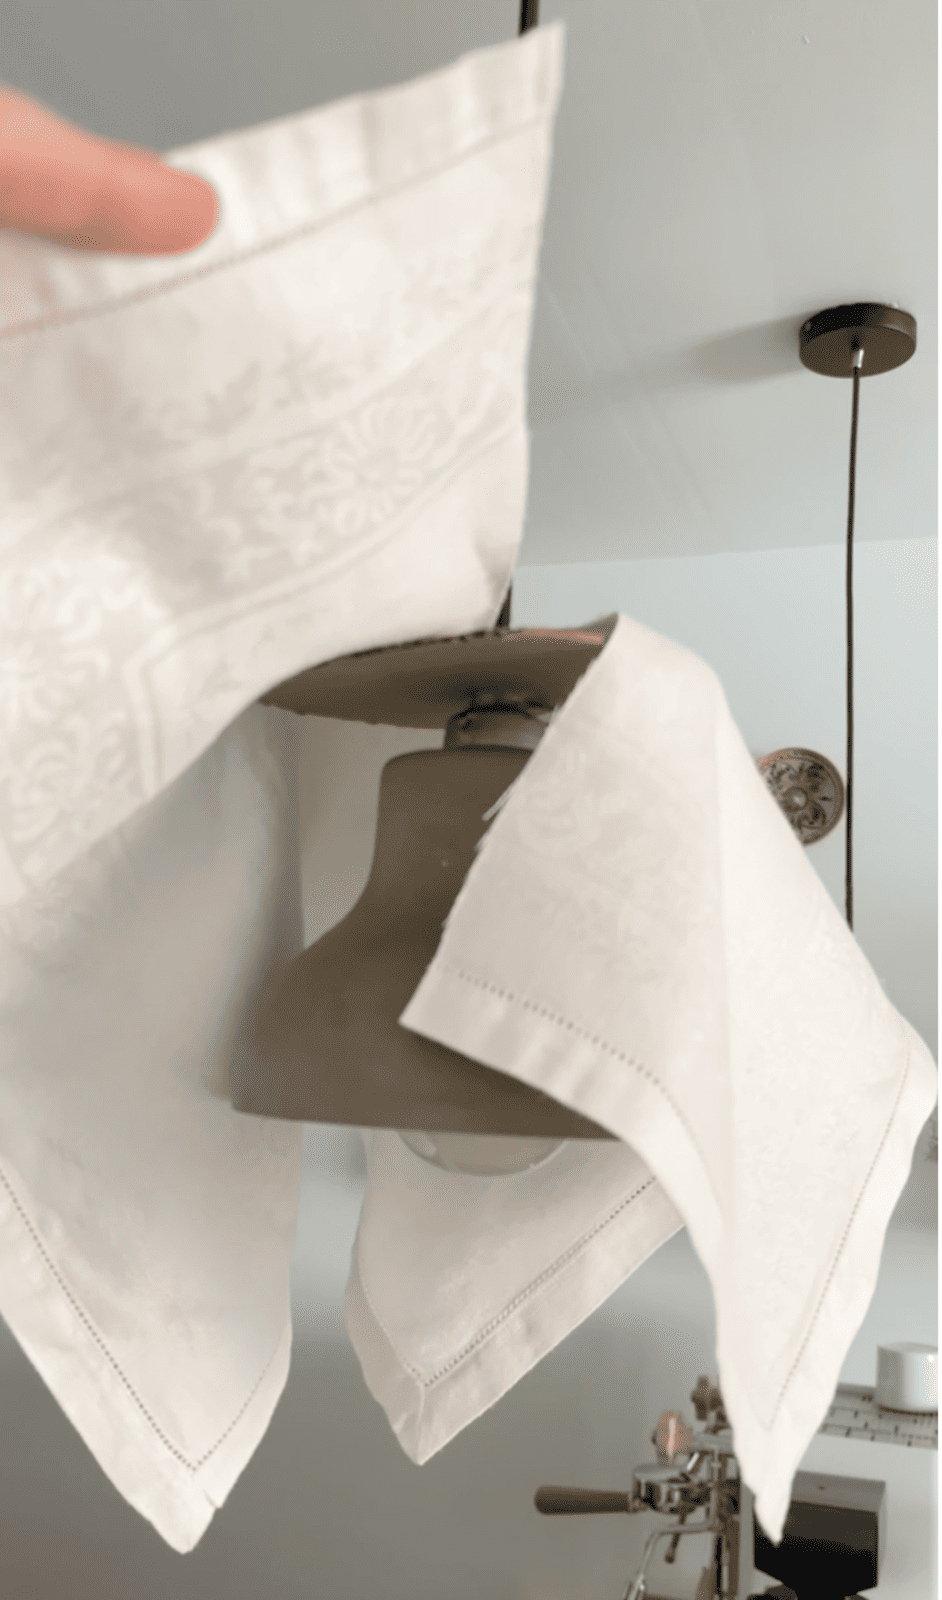
Install - slide the opening of the cardboard around the cord of the pendant resting it on the top of the light. Drape the napkin on top and fasten the button. Adjust to move the seam away from the most prominent sight lines.
The result
I’ve had these shades up for several years, and I’m still thrilled with the result. They’ve helped transform a cold, sterile kitchen into a warm, inviting place – which is so important given it’s a space where I spend a lot of time. Since they are fabric, they can get dirty just like anything else – but the best part is that they can come off easily and go in the wash. I still can’t believe something like this doesn’t exist – they're so great as shades for small pendants like mine or I could imagine them on a bigger pendant light like over a kitchen table.
Try these other lamp DIYs
IKEA furniture gets a bad rep, seen as a stop-gap — cheap and reasonably well-designed pieces that serve a purpose on the path to what you really want. But I’ve found IKEA pieces provide a neutral base that’s perfect for transforming into something special. The dining room table was the first IKEA DIY, then I updated a couple other pieces that have added so much character to my home.
String lampshade
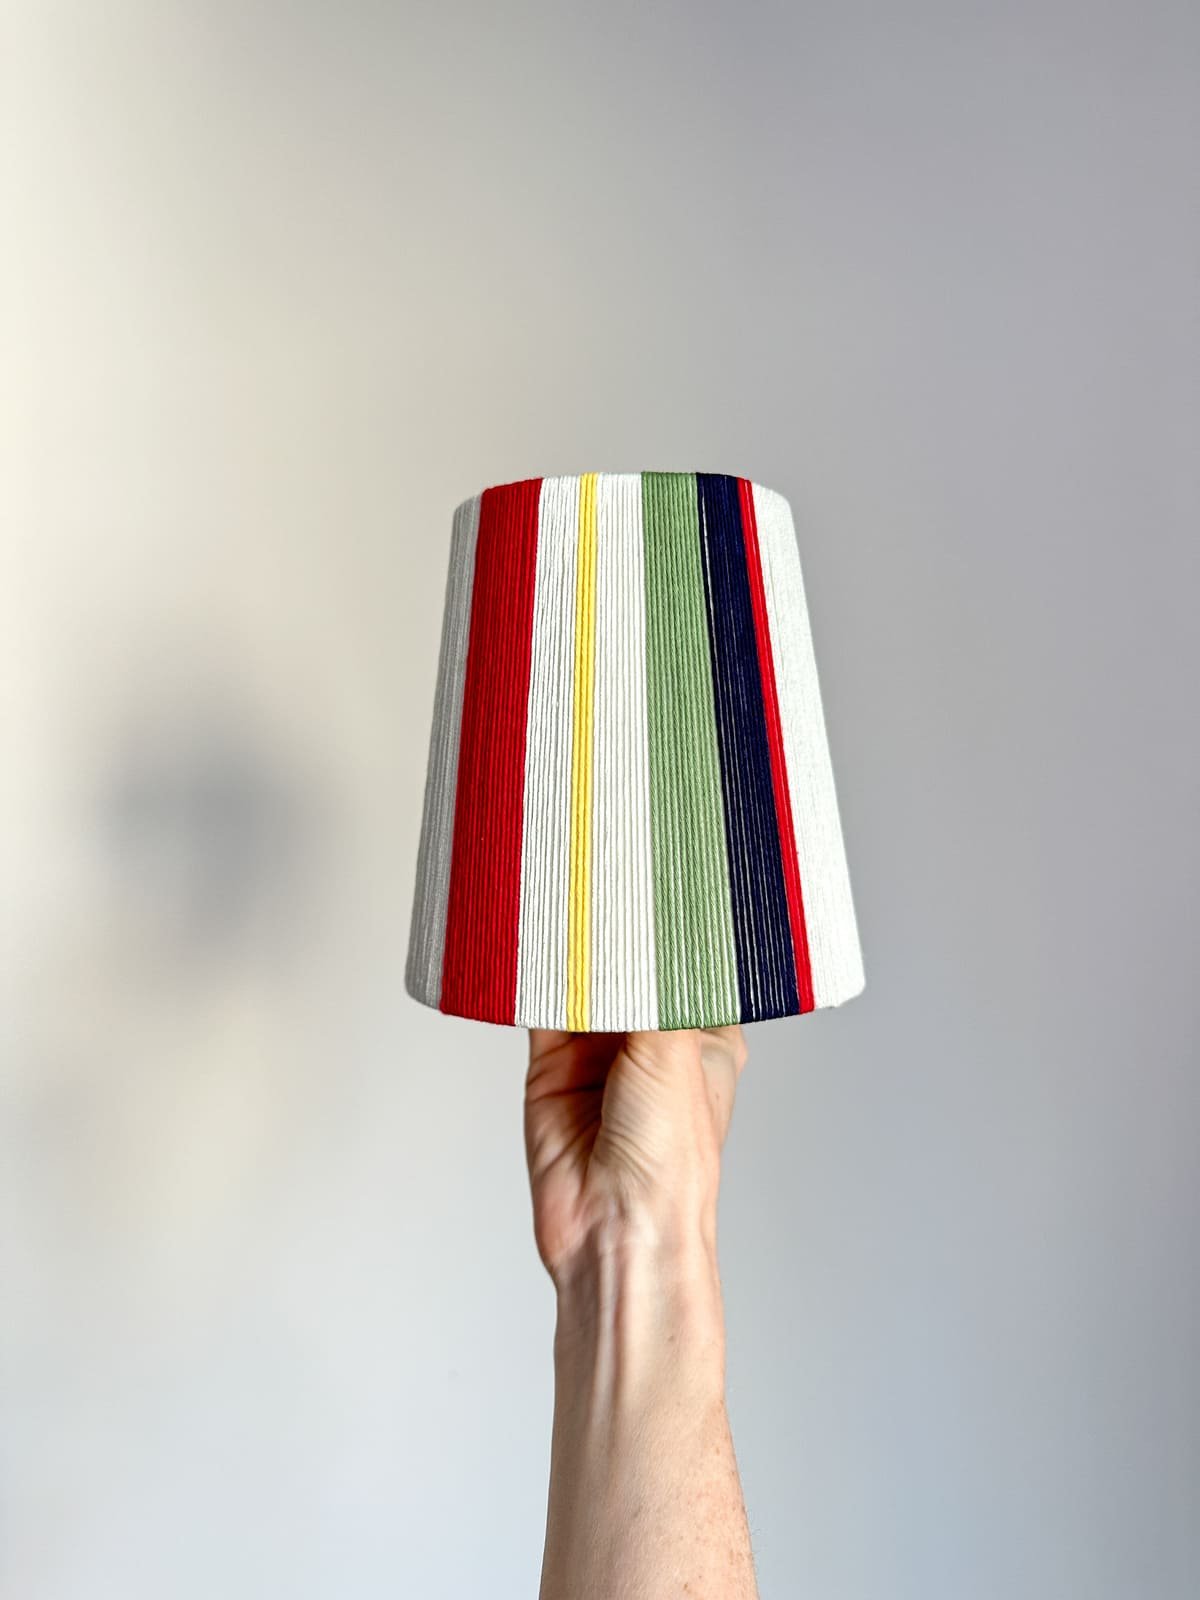
I wrapped needlepoint thread around an old lampshade (I removed the fabric from mine but kept the plain base shade.) I alternated colors to create a design I liked. I used a hot glue gun to attach the start of the thread and the end of the thread on the inside of the shade.
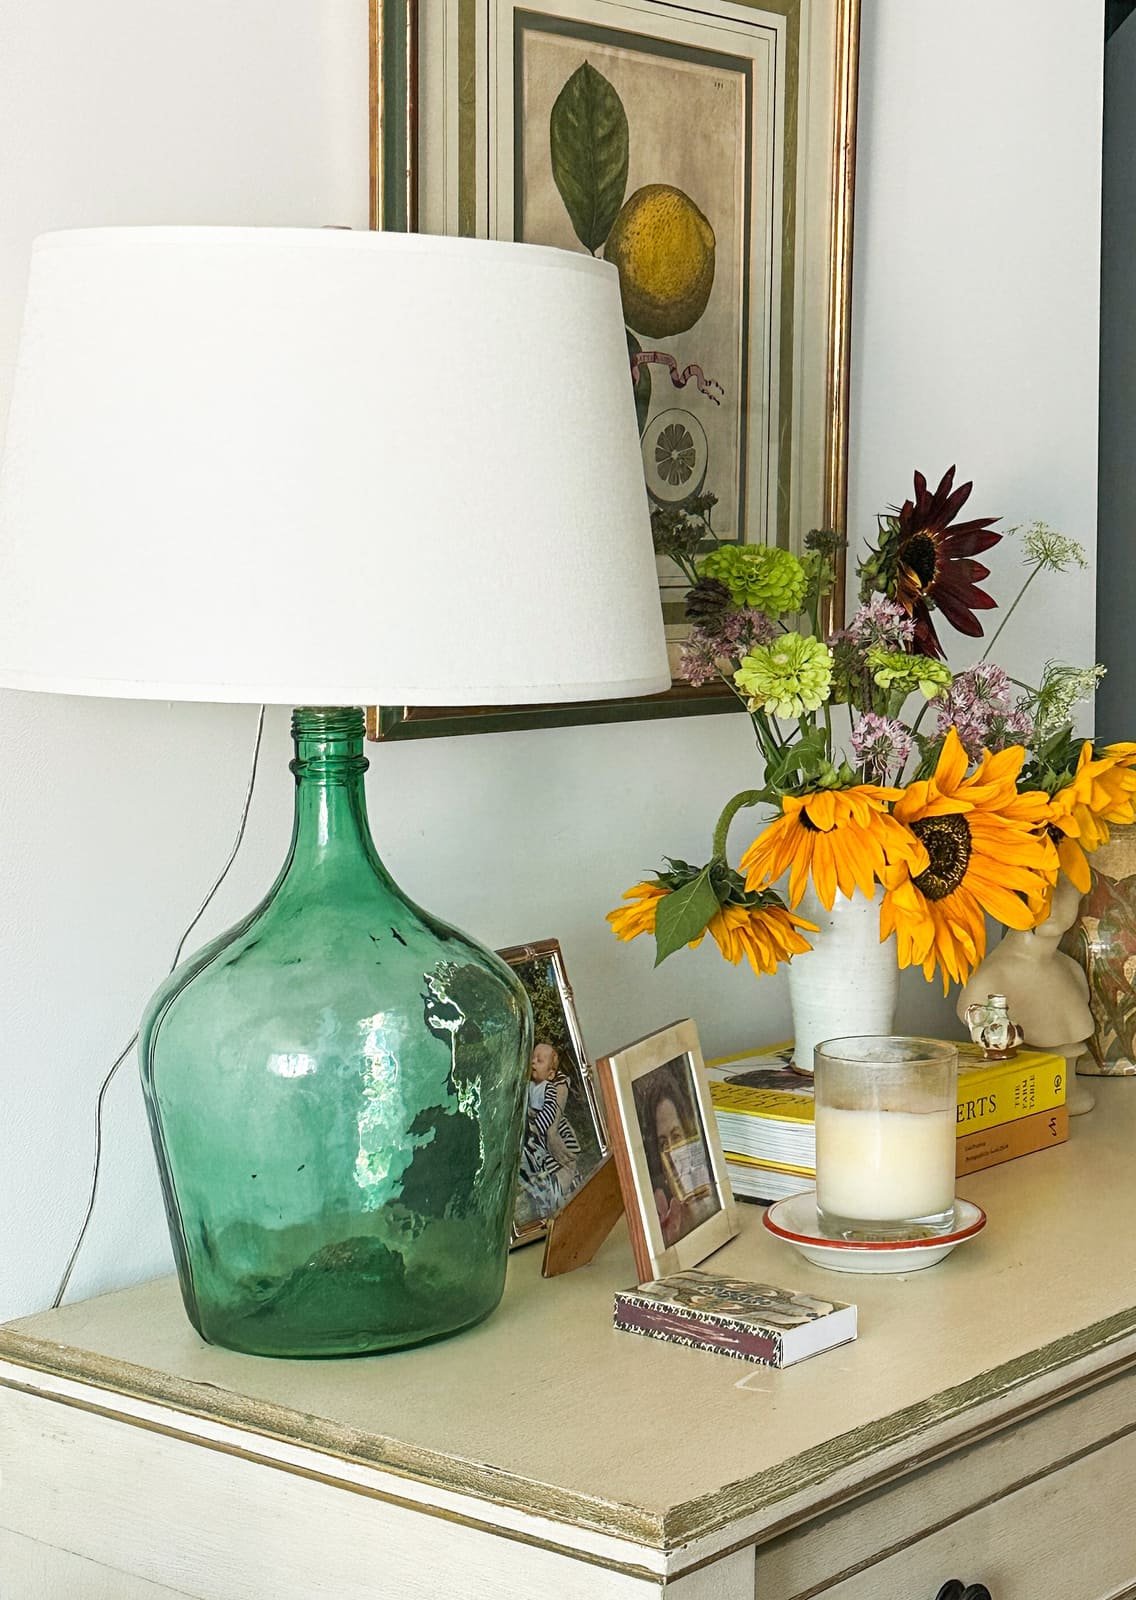
Demijohn lamp
I converted an old demijohn glass bottle into a lamp. I corked the bottle and then attached a lamp converter kit that I got on Amazon and used a lampshade I already had.
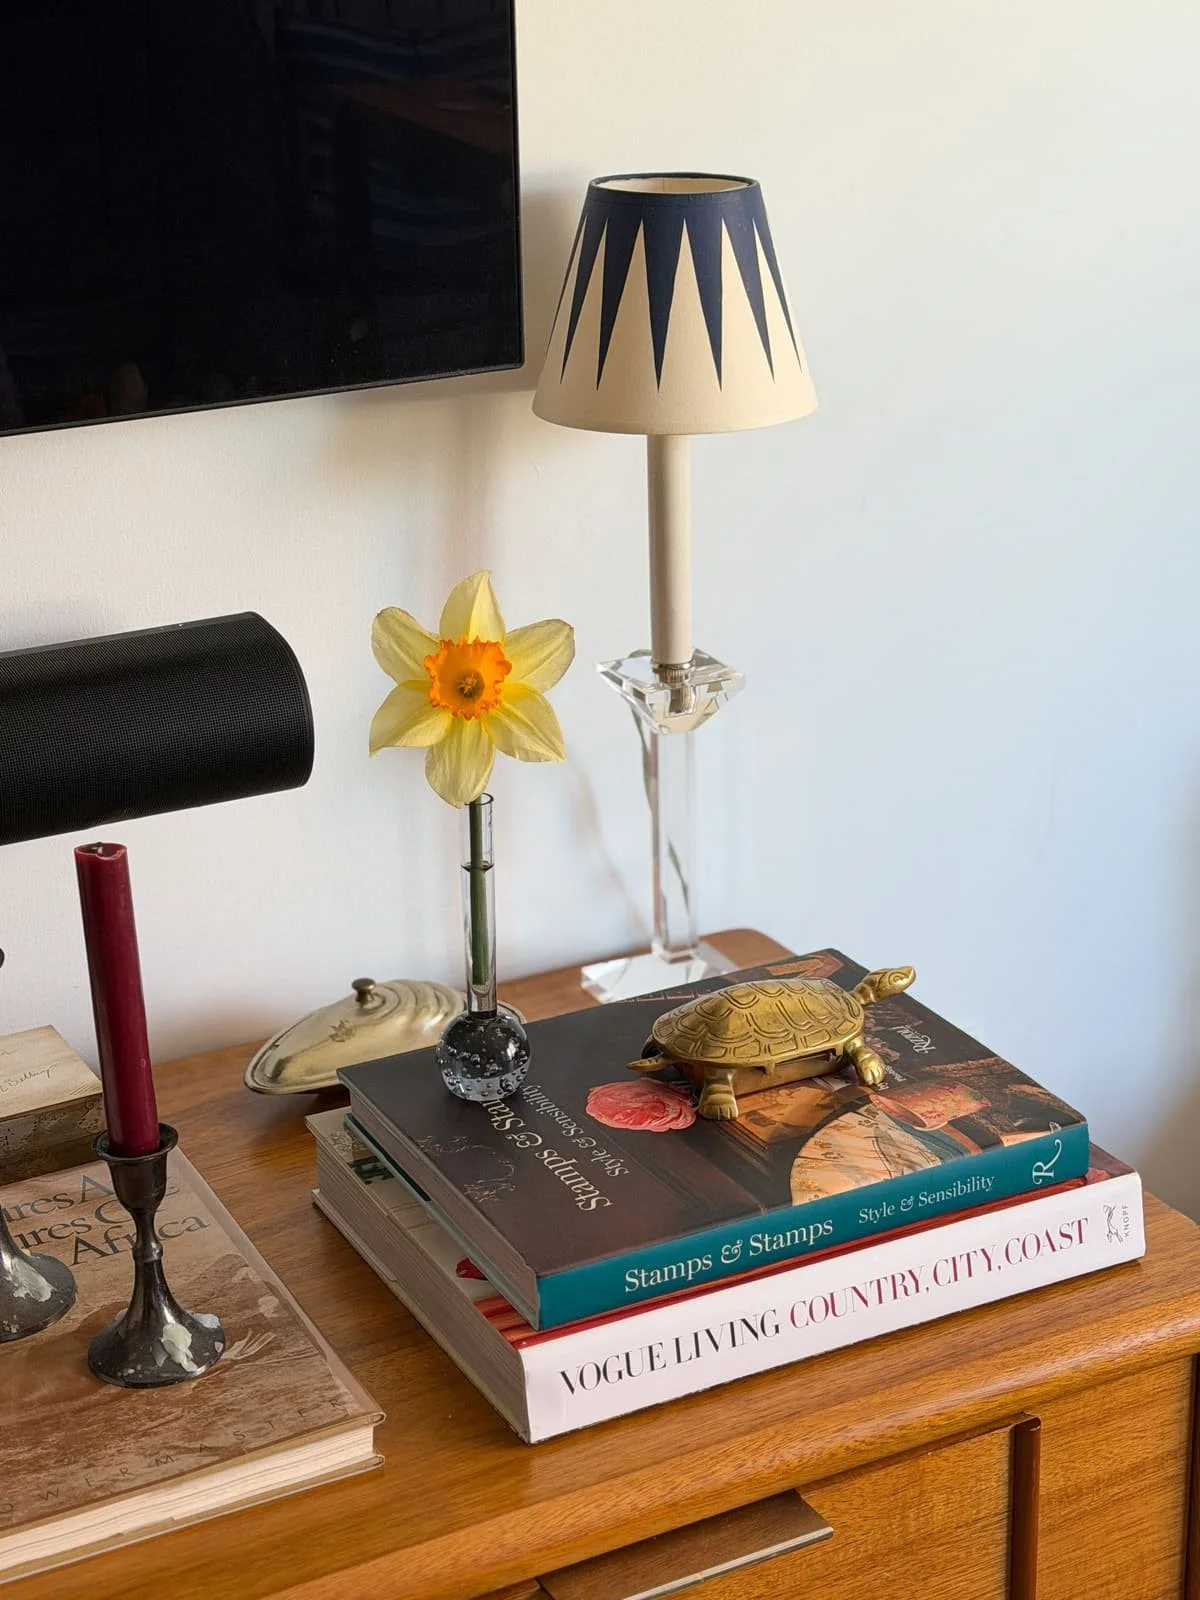
Candlestick lamp
I have a set of acrylic candlesticks that were converted into lamps. All you have to do is insert this adapter into the part where the candle would go – add a lightbulb and shades.
More home DIYs
See the IKEA pine table glow-up and painted IKEA chairs.